Steve's
vannin & RV'in
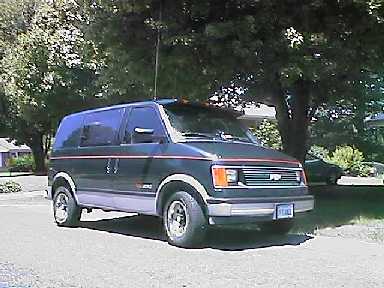
This is a Picture of my 1988 Chevrolet
Astro van. It is 1 of only 1500 built with both the 5-speed transmission,
and the 4.3 liter V6. This picture is about 2 years old, but not
much has changed on the outside since then. Here's some OEM spec's
on this model
ENGINE:
4.3 liter, 262cid, 90 degree V6, 160HP @ 4000 RPM, 240 lb/ft @ 2500
RPM
INTAKE:
400 CFM throttle-body fuel injection, Rochester model 220, 9-12lbs fuel
pressure
EXHAUST:
single exhaust, 2 inch
TRANSMISSION:
5-speed Borg-Warner T5
TIRES:
205/75R15 Uniroyal "Tiger Paw"
A/C SYSTEM:
GM-Harrison R4 compressor, R12 refrigerant
FRONT END:
Dual A-arm
AXLE/REAREND:
Fiberglass leaf springs, 3.08:1 posi-traction
STEERING:
Power-assist recirculating ball
ELECTRICAL:
100Amp self-regulated alternator, 500CCA Delco Freedom Battery
Since I've bought this van, I have
done some modifications to some of the above componets as outlined below.
Most of the upgrades and repairs to the Astro van are rather straightforward
and easy, but some of them have some snags that can cause LOTS of headaches
and frustration.
TIRES: The Astro's OEM tires
are a little bit too tall, and narrow for it's suspension.
This makes for a bouncy ride, and very light, vauge steering. I have
found out P225/70R15 BFGoodrich TA's make the little van handle pretty
good, and also give a tighter, more responsive feel to the steering.
I am considering going to P225/60R15 tires, which have an even lower profile.
This size should lower the ride height about an inch off of OEM (lowering
center of gravity), and make steering a little more responsive, and improve
cornering too.
INTAKE: The 4.3 engine in
these vans is pretty much the same as the 5.7 liter V8, just minus 2 cylinders.
The thing I can't understand is why Chevy put such a small intake on these
engines. The Holley Pro-Jection model
502-7 fits just about any fuel-injected 5.7 or 4.3 engine. This is
a pretty worthwhile upgrade, especially if you tow trailers, like I do.
When you're runnin around in the hot, humid summertime, air is less dense,
and this engine was running out of breath trying to breathe through the
"soda straw" OEM fuel injector throttle body. The Holley
solves this problem.
The installation
is rather straightforward, and can be done in about an hour or two.
There are some vacuum outlets on this unit that may or may not be used
depending on the age of your engine, they will need to be capped.
Since this throttle body is made to fit a variety of vehicles, you may
need to tweak the the Throttle position sensor, and the fuel pressure regulator.
The best way to do this is to use a code scanner. You need to try
and get the BLOCK LEARN code as close to 128 as possible. Low number
is too rich (too much pressure), and a high number is too lean.
A fuel pressure gauge is also useful. If neither one of these tools
is handy, you can get it into the ballpark by watching the CHECK ENGINE
light for code 45's (too rich) or code 44 (too lean) and tweak till you
don't get any lights.
I also
recommend installing K&N air filter, or some
other type of high CFM air cleaner with the Holley, because the OEM one
is just simply too small.
EXHAUST: Now that we got the
van inhaling OK, we need exhale too, after all, an automobile engine is
nothing but a self-powered air pump. For this job, I chose to use
a MAGNAFLOW muffler. The one I chose splits into two outputs, which
come out underneath the rear bumper, giving the illusion of a full dual
exhaust system. The Magnaflow muffler is sort of like the old-style
glasspacks, but is oblong in shape, and is not quite straight through.
The muffler gives pleasing mellow sound below 3000 RPM, and really makes
some noise when the engine's crankin over that. That's all I've done
to the exhaust system so far, future upgrades include headers, so stay
tuned!
DEEP-CYCLE BATTERY: Since
the late 70's GM has used side-terminal batteries, which has hindered users
from installing any old battery. This is true in the Astro's as well.
I have found out that the Delco Voyager, or any group size 27 battery actually
fits quite nicely in this van though! The battery needs to be installed
backwords from it's OEM postion, and the cables routed slightly differrently.
This configuration will place the positive lead on the right side, under
the fender, and the negative on the left, beside the brake master cylinder.
On most Deep-cycle batteries, they have screw terminals, along witht the
posts. Just simply take the screw out of your battery cable so there's
a hole in the middle, and place on the screw terminal of the battery, and
tighten the screw...it's that easy! If you plan to use the screw
terminals from other accessories, you can buy the top to side terminal
converters, they work quite nicely too. I recommend leaving the screw
terminals open though, so you can jumpstart easily.
Warning:
If you replace your power cable to your starter when you do this, like
I did, Make sure the little pigtail wire going from the battery terminal
to the fusebox is large enough! This little pigtail handles all the
"accessory" draw on the vehicle, such as lights, AC, radio, ECM, and any
other thing electrical on the van but the ignition system. The EXIDE
cable that I bought only had a 12 gauge wire and was not enough to carry
all the power this van will draw, it needs at least an 8 gauge wire or
larger! If it's too small, this wire will melt, burn out, and leave
you with EVERYTHING in your vehicle DEAD!!!!